现在,Windows Azure越来越受欢迎。同时,我们都知道可以在Windows Azure上部署虚拟网络。然而,部署Windows Azure的虚拟网络是一件很烦人的事情。因此,我们可以使用Windows Server 2012的RRAS Roles提供 VPN。按照下面的步骤可以实现。
前提条件
创建SSL证书。
由于SSTP VPN是一种基于HTTPS的VPN,所以我们需要创建一个SSL证书。如果您想从SSL认证机构购买一个SSL证书,那会更好。如果不想买,我们可以创建一个自签名证书(self-certificate)。
首先,打开IIS manager,选择Server(RoccosVPN) – Server Certificates。如果在这个窗口显示有一个颁发给您的VM FQDN名字的证书,请其导出私钥。或者,你按照下面的步骤,制作自签名证书。
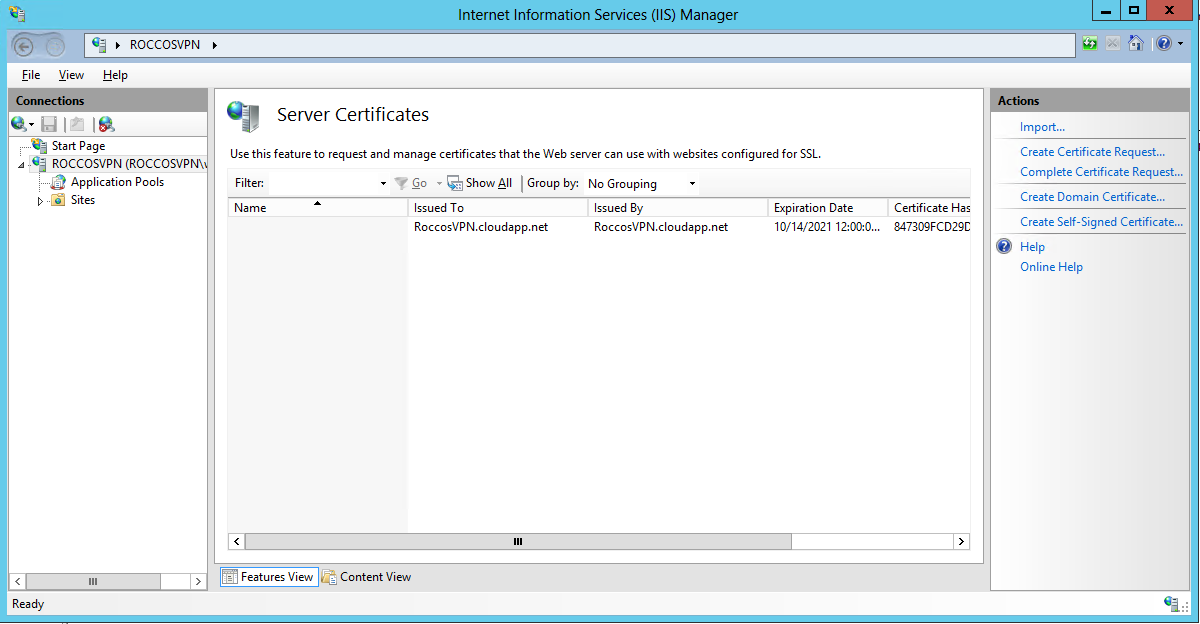
图 1 – 服务器证书
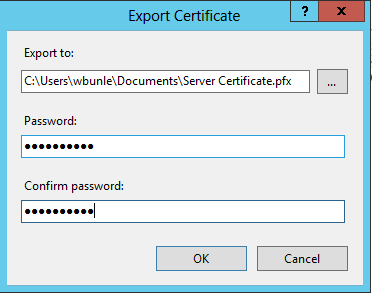
图 2 – 导出证书
制作自签名证书
- 打开CMD提示符(管理员权限)
- 使用 SelfSSL (IIS6 Resource Kit) 为SSTP生成一个自签名SSL证书。
selfssl.exe /N:cn=RoccosVPN.cloudapp.net /V:3650
(3650 == 10年,”RoccosVPN.cloudapp.net” 表示一个合格的域名,the fully-qualified domain name, FQDN) - 输入”y”确认, 忽略metabase error(如果出现)
- 运行 mmc.exe, 添加 snap-in for Certificates -> Computer account
- 点击 Personal -> Certificates
- 在 RoccosVPN.cloudapp.net certificate 上单击右键, 然后选择 All Tasks -> Export, 包括private keys和protect with password。
第一步, 创建 Windows Azure VM
点击左下角按钮 NEW, 选择 COMPUTE – VIRTUAL MACHINE – QUICK CREATE, 在文本框中填写 DNS NAME, USER NAME 和 NEW PASSWORD。
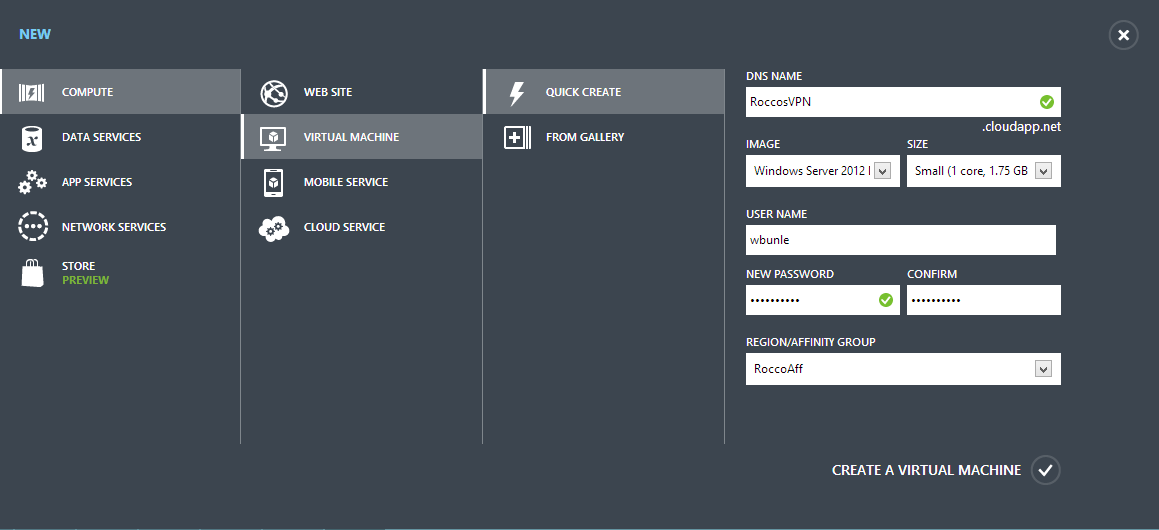
图 3 – 创建 VM
第二步, 配置 Windows Azure
为了部署 SSTP VPN, 首先, 我们应当为 VM 开启 TCP 443 端口。

图 4 – Azure Endpoint
然后使用 RDP(Remote Desktop Protocol,远程桌面协议) 连接 VM 。
第三步, 添加 Server Role
点击 Server Manager – Add roles and features,然后它会弹出一个窗口。在这个窗口中,我们将添加
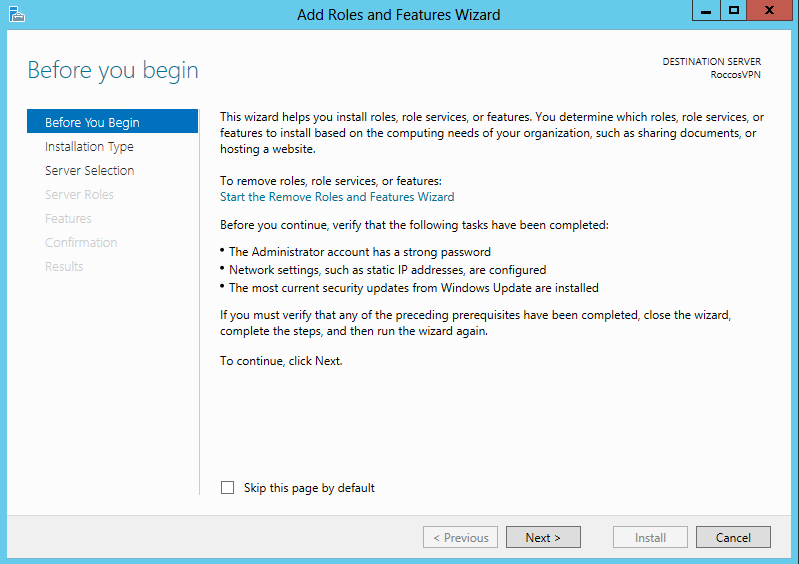
图 5 – 添加 Roles
它会弹出一个窗口。在这个窗口中,我们将添加 Remote Access role, DirectAccess and VPN (RAS) and Routing role services.
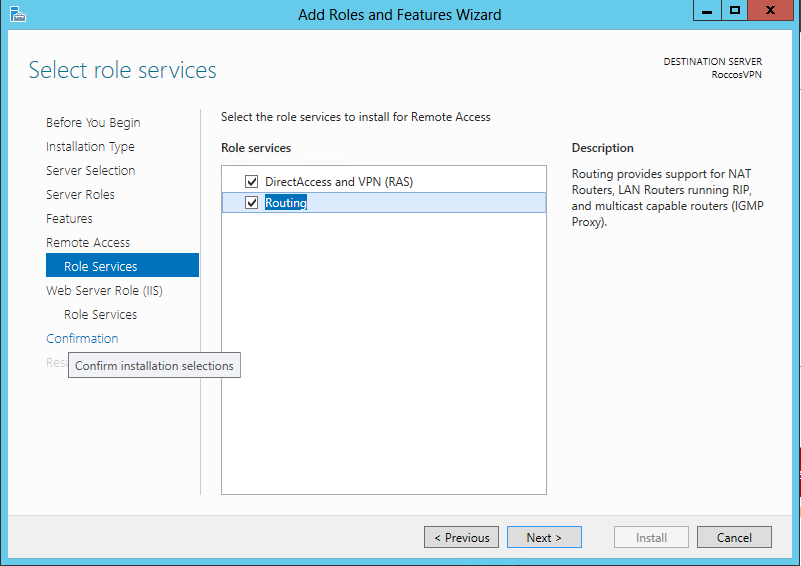
安装 role and role services之后,它可能需要重新启动。
第四步, 配置 Routing and Remote Access
重新启动之后,打开 Server Manager – Notification – Open the Getting Started Wizard, 选择 Deploy VPN only.
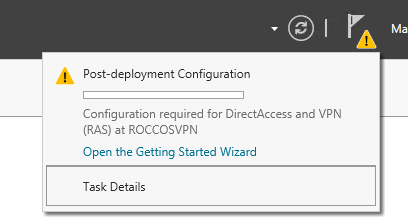
图 6 – Getting Started Wizard
现在,打开 Routing and Remote Access 窗口。 右键点击服务器名称,点击 Configure and Enable Routing and Remote Access。
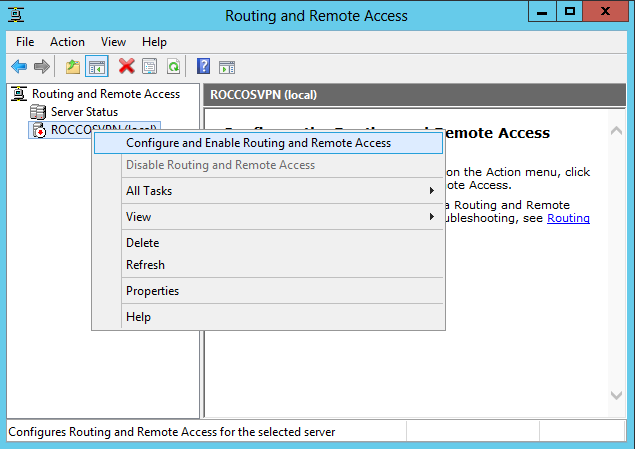
图 7 – Routing and Remote Access Configure
然后, Routing and Remote Access Server Setup Wizard 将被打开。
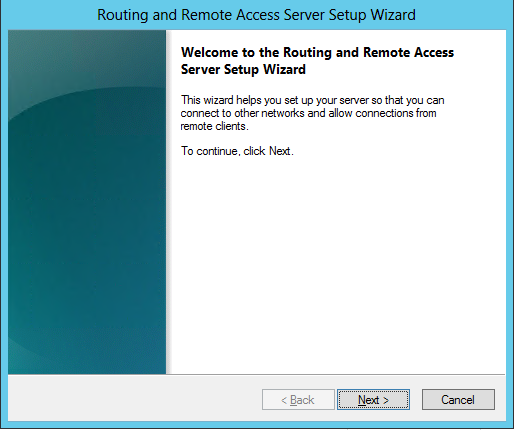
图 8 – Setup Wizard
点击 Next 按钮后,选择 Custom configuration,并在Custom Configuration界面勾选 VPN access 和 NAT 。
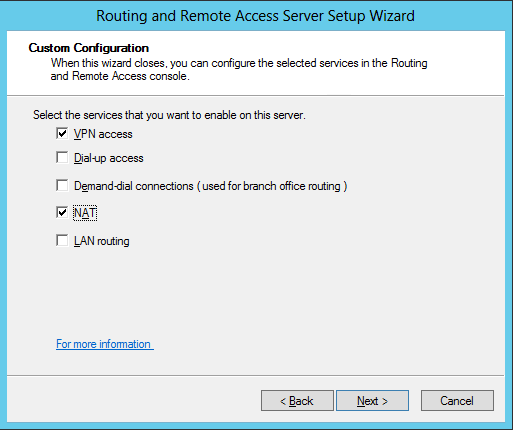
图 9 – Customer Configuration
单击 Finish后,它会启动 Routing and Remote Access 服务。
在服务器上单击鼠标右键,然后单击 Properties ,选择 Security 选项卡。在该选项卡中,选择roccosvpn.cloudapp.net证书。
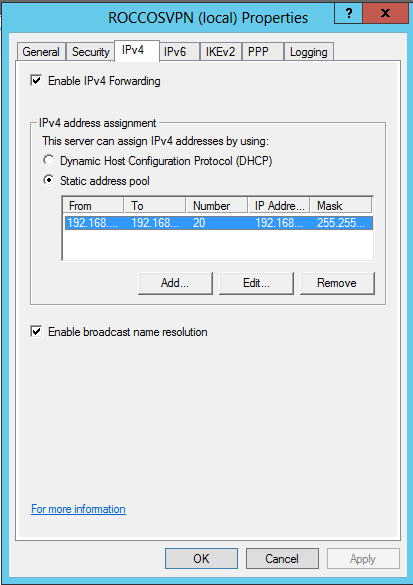
然后,点击 IPV4 选项卡,选中 “Static address pool” 为客户端获取 IPv4 地址并点击 OK 确定,如下:
点击 IPv4 node 并展开。右键单击 NAT 选择 New Interface…
在这个对话框中,选择一个 external interface。在 Network Address Translation Properties 对话框中,选择Public interface connected to the Internet 和选中 Enable NAT on this interface。点击 OK 保存配置。
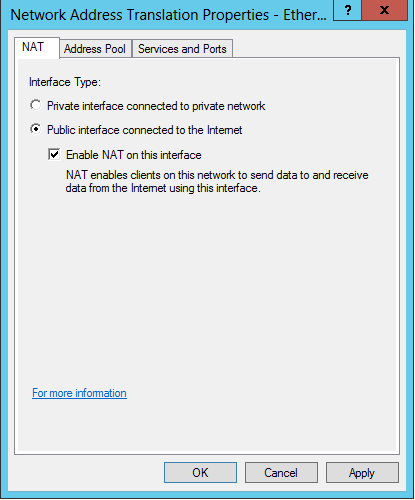
图 10 – NAT Properties
第五步, 添加 VPN Users
使用 Local Users and Groups 管理工具来添加一个新用户。
打开 Run 对话框并输入 lusrmgr.msc 然后点击 OK 打开 Local Users and Group management.
然后单击 Users 文件夹,在中间面板上的空白处单击右键,选择 New User ,输入 Users Name, Full Name 和 Password,取消选中 User must change password at next logon.
之后,双击这个用户名,切换到 Dial-in 标签。在 Network Access Permission 中选择 Allow access。
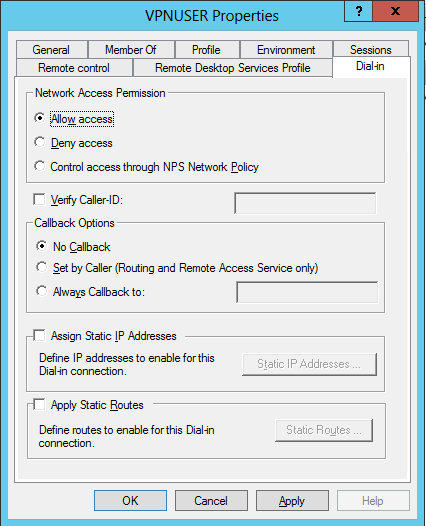
图 11 – User Properties
第六步, Client Configuration
安装从服务器导出的证书到 Trusted Root Certificate Authorities.
转到 Network and Sharing Center,单击 Setup a new connection or network,然后选择 Connect to a workplace 然后再选 Use my Internet Connection (VPN).
在Internet Address 中输入RoccosVPN.cloudapp.net,并输入您的 Destination Name 然后 Create.
点击网络托盘图标,右键单击VPN connection,然后选择 Properties。
切换到 Security 选项卡。更改 VPN type 为 Secure Socket Tunneling Protocol (SSTP).
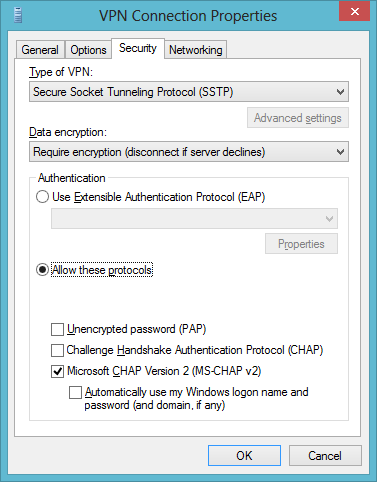
最后,选中 Microsoft CHAP Version 2 (MS-CHAP v2) 并点击 OK 。
现在,连接这个VPN,输入您的VPN用户信息。开心的享用您的Windows Azure VPN。
第七步, L2TP VPN Deployment
部署 L2TP VPN时,我们首先应当在Windows Azure中开启一些 UDP 端口。
L2TP port: UDP 1701
IPsec port: UDP 500
IKEv2 port: UDP 4500
此外,在Windows Server防火墙添加例外。
然后打开 RRAS management tools,右键单击服务器,选择 Properties 和 Security 选项卡。
选中 “Allow custom IPsec policy for L2TP/IKEv2 connection” 并输入Preshared Key(预共享密钥)。

参考文章:How to Setup Windows Azure (Server 2012) as an SSTP and L2TP VPN Provider
英文链接:How to Deploy SSTP and L2TP VPN in Windows Azure (Windows Server 2012)