SoftEtherVPN是由日本筑波大学(University of Tsukuba)的登 大遊 (Daiyu Nobori)在硕士论文中提出的开源、跨平台、多重协议的虚拟专用网方案。
本文CentOS/Debian安装环境为例,讲解如何安装SoftEtherVPN Server For Linux。
第一部分:安装SoftEtherVPN Server
安装编译环境(适用于CentOS)
yum -y install gcc
安装编译环境(适用于Debian)
apt-get update && apt-get upgrade
apt-get install build-essential -y
从SoftEther下载中心下载SoftEtherVPN Server For Linux
wget https://www.softether-download.com/files/softether/v4.43-9799-beta-2023.08.31-tree/Linux/SoftEther_VPN_Server/64bit_-_Intel_x64_or_AMD64/softether-vpnserver-v4.43-9799-beta-2023.08.31-linux-x64-64bit.tar.gz
或者从GitHub下载SoftEtherVPN Server For Linux
wget https://github.com/SoftEtherVPN/SoftEtherVPN/releases/download/5.02.5185/SoftEtherVPN-5.02.5185.tar.xz
解压文件
tar -zxvf softether-vpnserver-*.tar.gz
进入到解压目录
cd vpnserver
启动安装脚本
./.install.sh
阅读License,根据提示,输入“1”然后回车确认。
如果提示不识别某些命令比如gcc,另行安装即可。如果没有异常则说明安装成功。
启动服务
./vpnserver start
(停止服务命令为:./vpnserver stop)
可以用systemd启动vpnserver,先新建启动脚本/etc/systemd/system/vpnserver.service:
[Unit]
Description=SoftEther VPN Server
After=network.target

[Service]
Type=forking
ExecStart=/root/vpnserver/vpnserver start
ExecStop=/root/vpnserver/vpnserver stop

[Install]
WantedBy=multi-user.target
然后就可以通过systemctl start vpnserver启动了,并通过systemctl enable vpnserver设置开机自启。
启动成功后我们需要设置远程登录密码以便本地管理服务。运行下面的命令进入VPN的命令行:
./vpncmd
选择1. Management of VPN Server or VPN Bridge
这里需要选择地址和端口。默认443端口,如果需要修改,可以输入localhost:5555(实际端口),然后出现:
If connecting to the server by Virtual Hub Admin Mode, please input the Virtual Hub name.
If connecting by server admin mode, please press Enter without inputting anything.
Specify Virtual Hub Name:
这里就是指定一个虚拟HUB名字,用默认的直接回车就行。
Connection has been established with VPN Server "localhost" (port 5555).

You have administrator privileges for the entire VPN Server.

VPN Server>
这时我们需要输入ServerPasswordSet命令设置远程管理密码,确认密码后就可以通过Windows版的SoftEther VPN Server Manager远程管理了。
第二部分:VPN管理
首先下载并安装SoftEther VPN Server Manager,安装之后运行它:
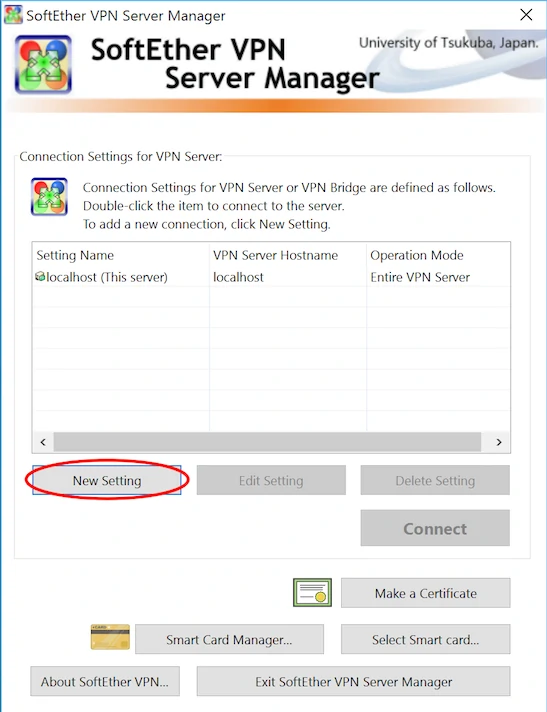
在这里点新建:
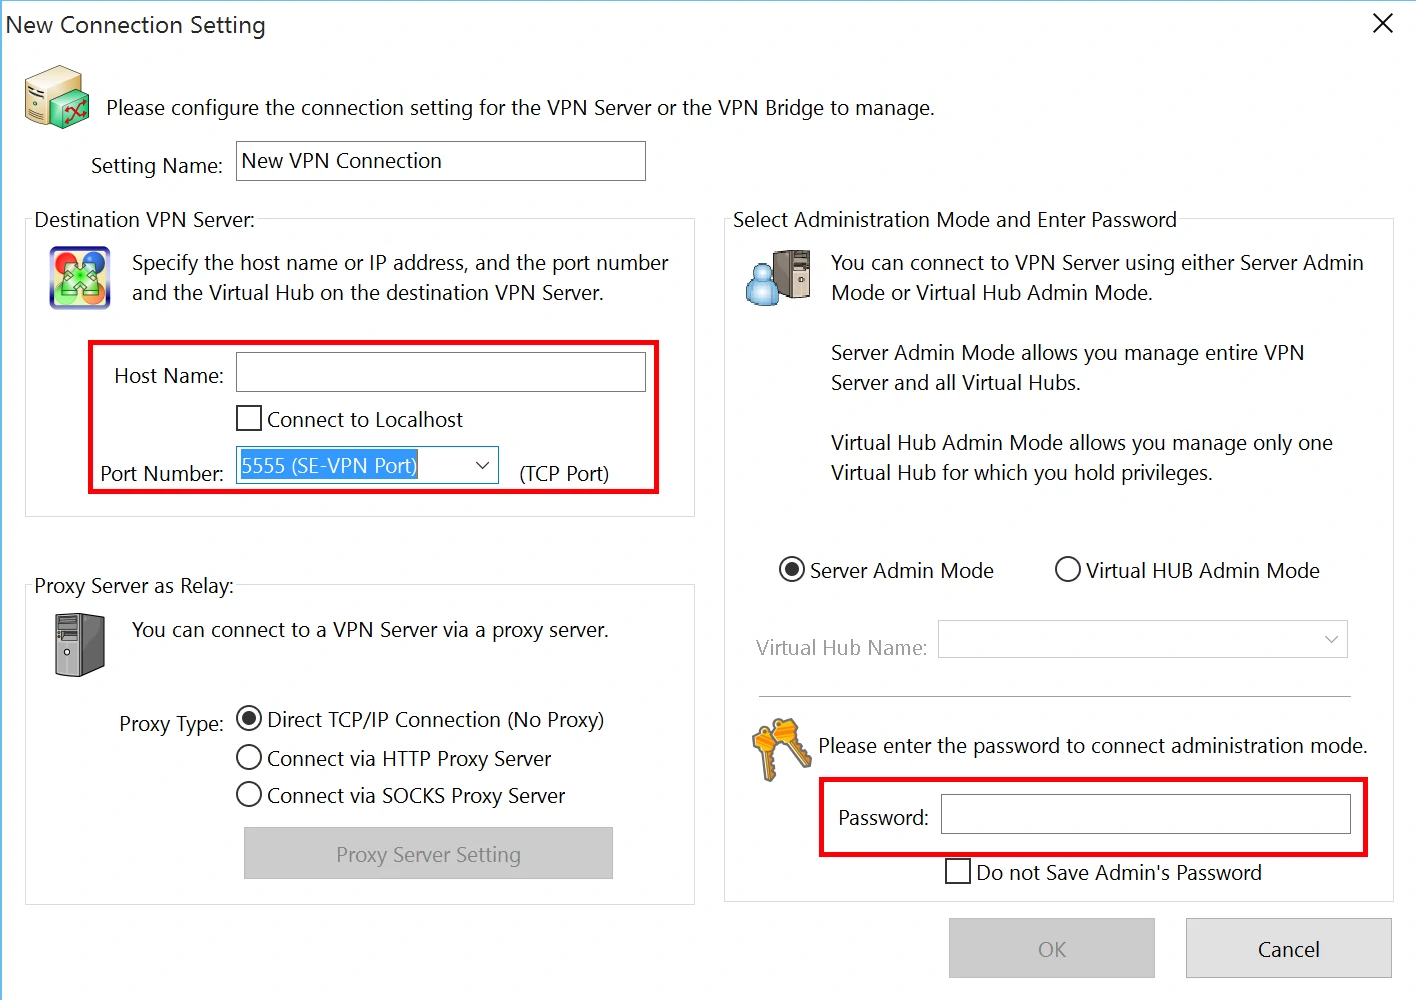
Host Name填服务器的地址或域名,端口如果之前改过了在这也记得改过来,右下角的密码填之前设置过的密码。新建完成后Connect就会弹出Easy Setup窗口(如果提示连不上请检查一下服务器的防火墙设置):
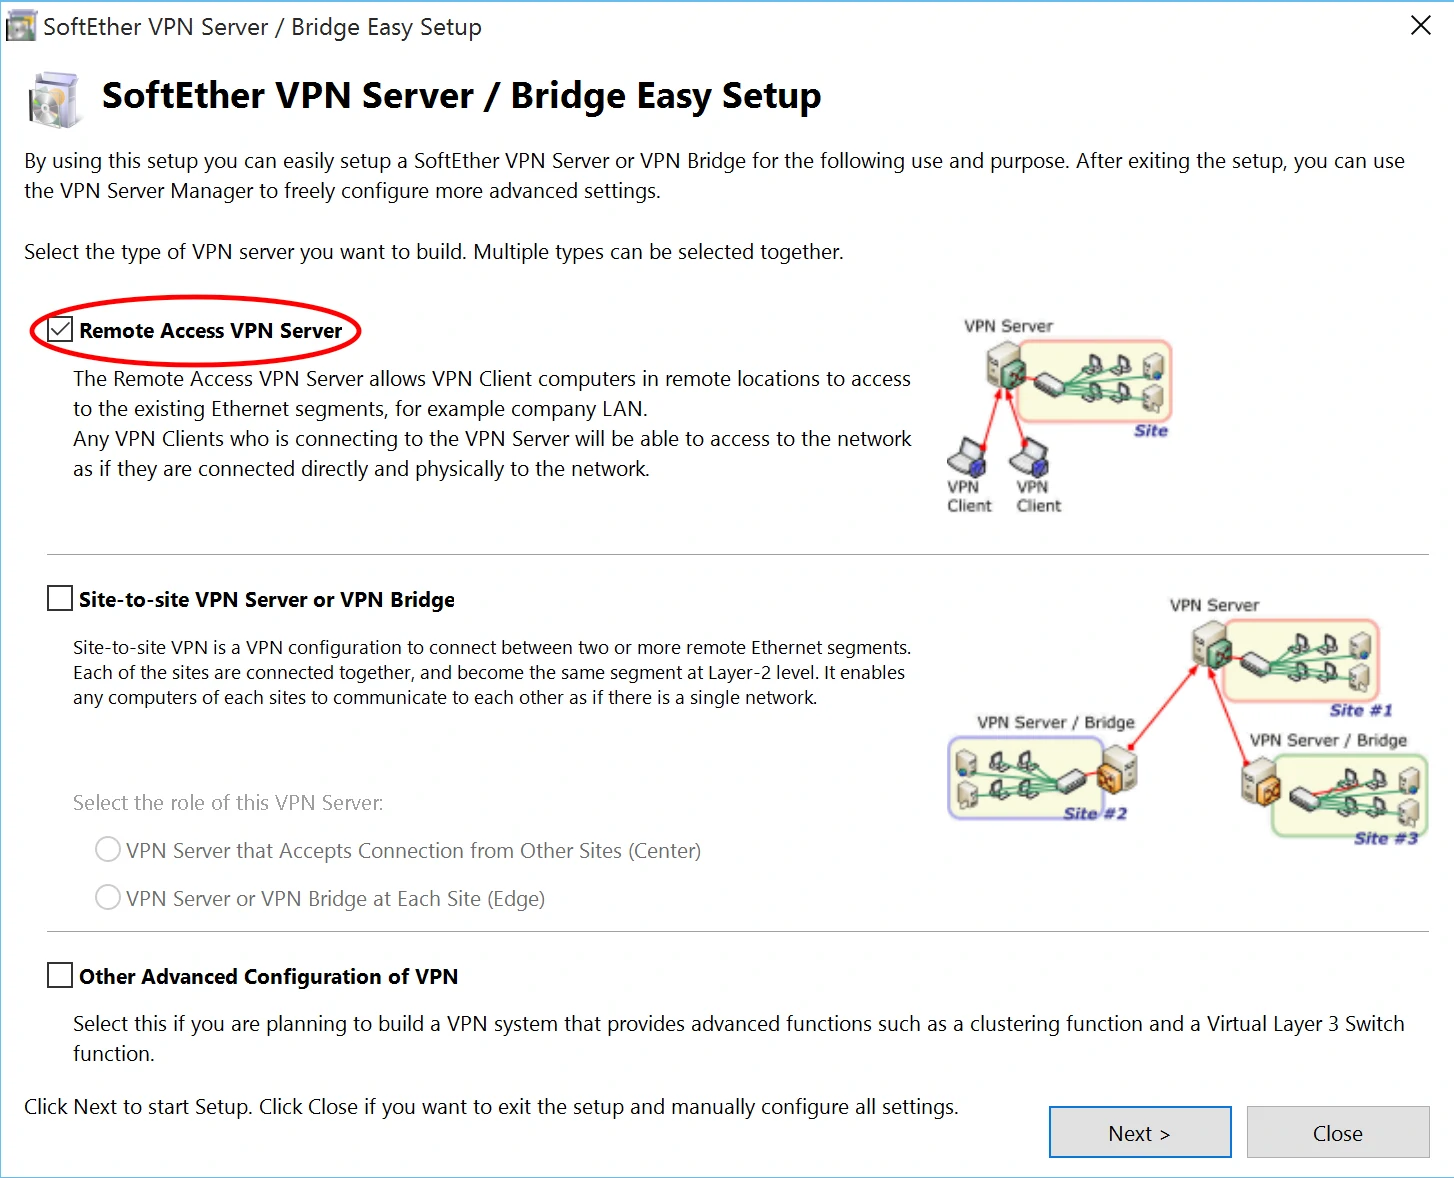
这里在第一个远程连接挑钩然后下一步即可,虚拟HUB名像之前一样默认就好。
然后会弹出一个动态DNS功能的窗口,由于不能确定它给的域名是不是被墙了,我们就不去用它,把这个窗口关了就行了。
之后会有一个协议设置的窗口:
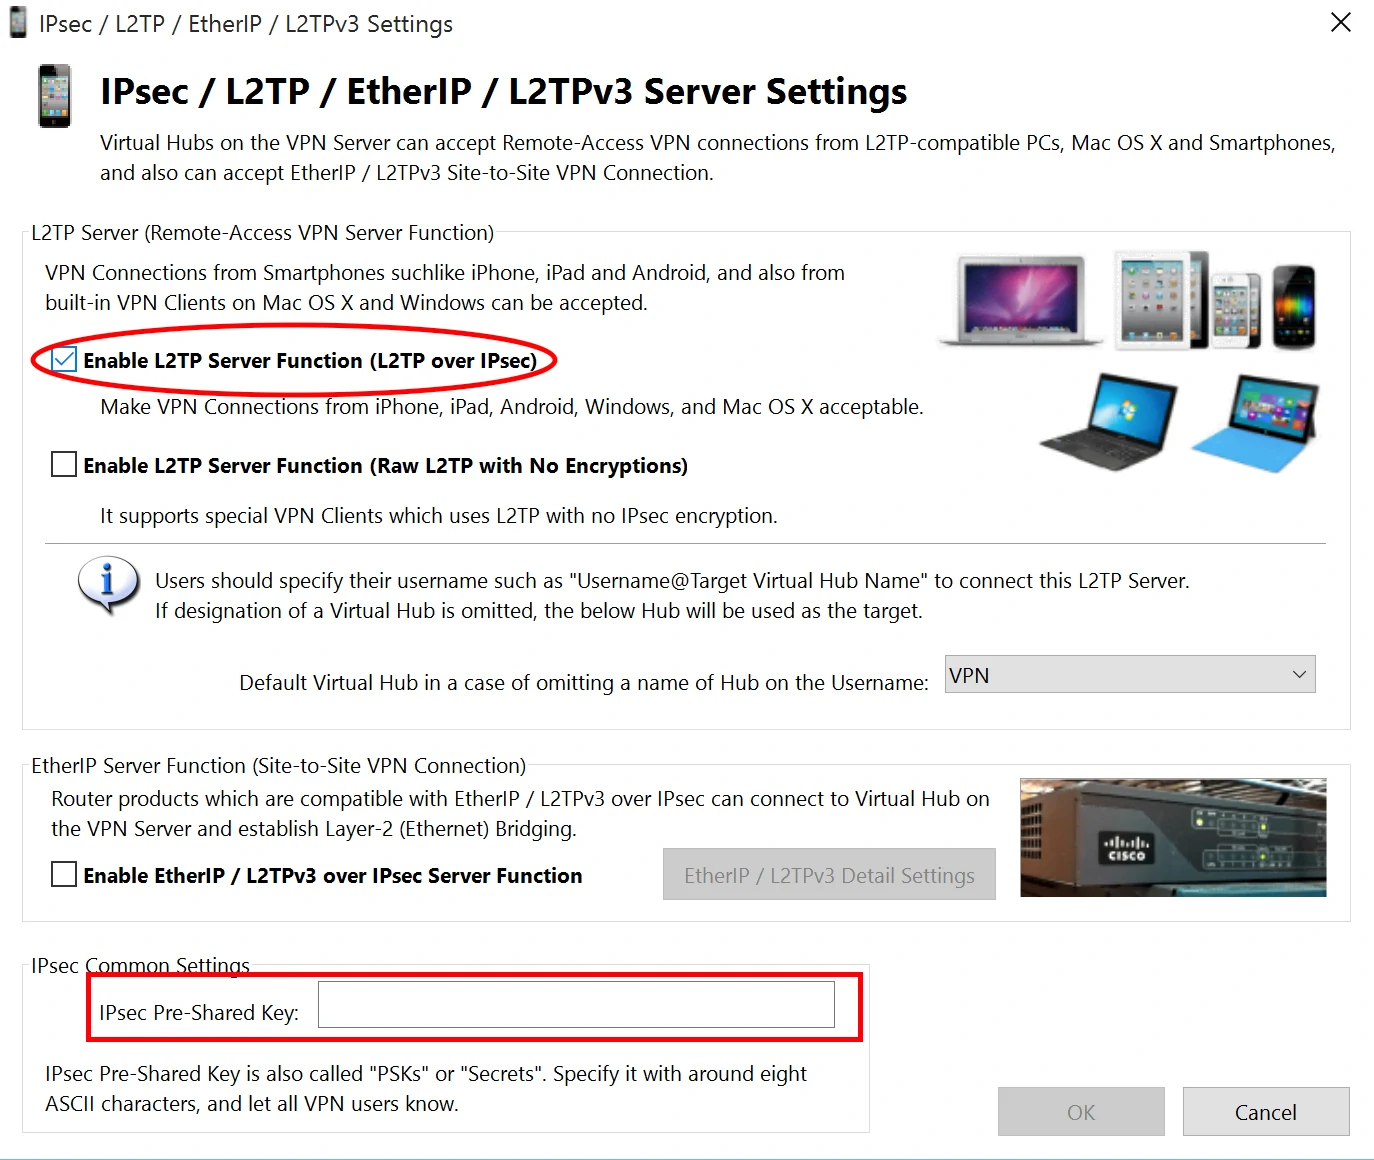
这里把启用L2TP挑上钩,下面设置一个IPsec预共享密钥就行了。
之后又会弹出一个VPN Azure Cloud服务的窗口,感觉没什么用,禁用了就行了。即使有用以后也可以再启用。
接下来要新建用户:
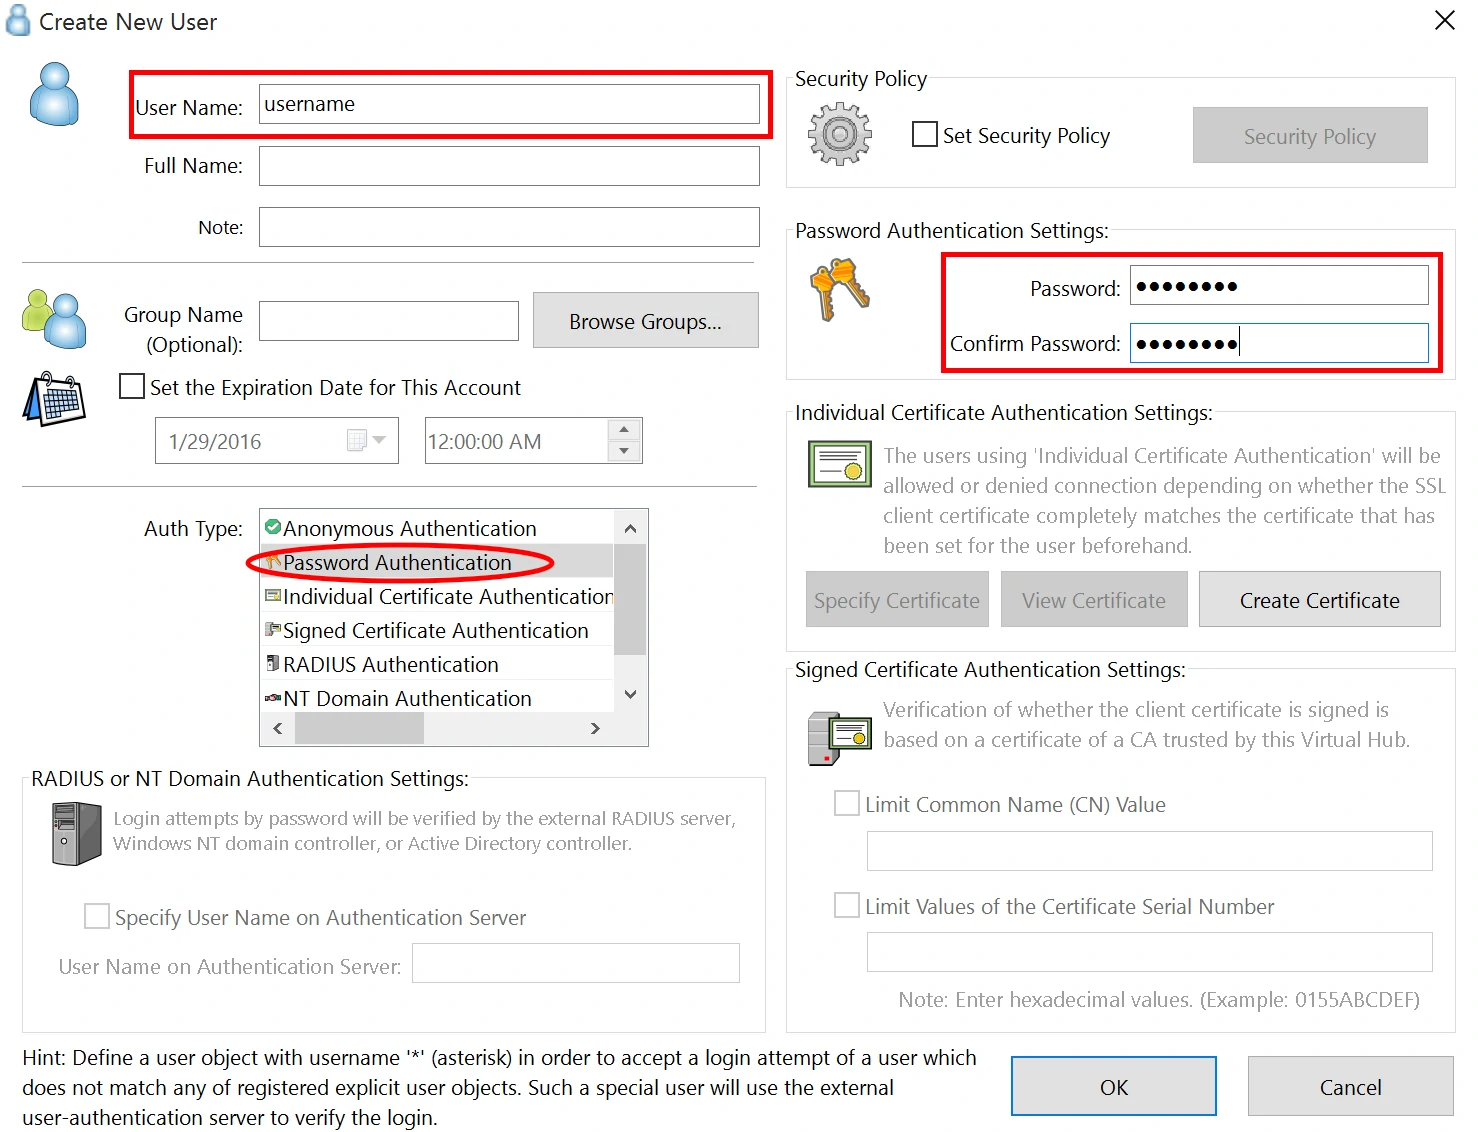
其中用户名是必填的,验证类型选密码验证就行,然后在右侧设置用户密码。
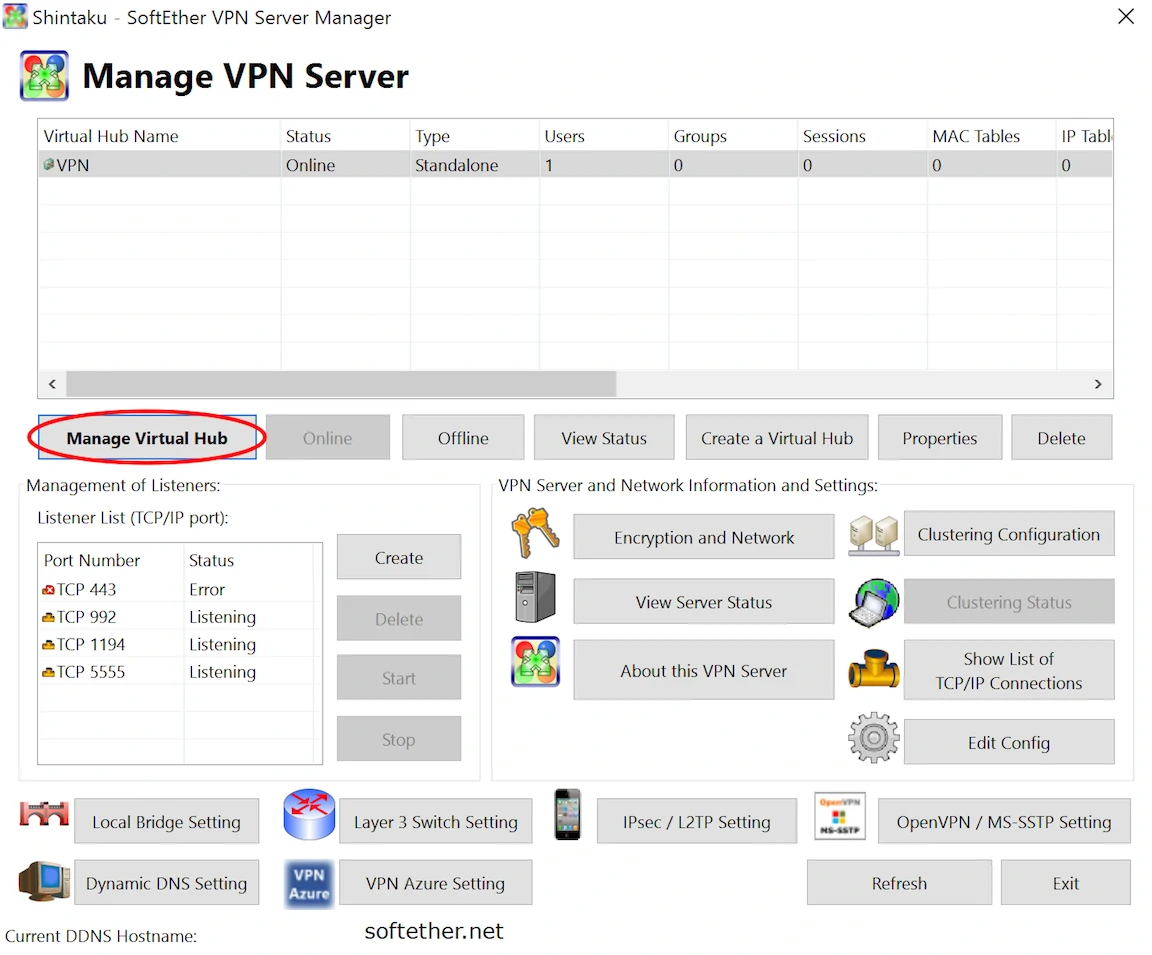
之后回到管理界面,点管理虚拟HUB:
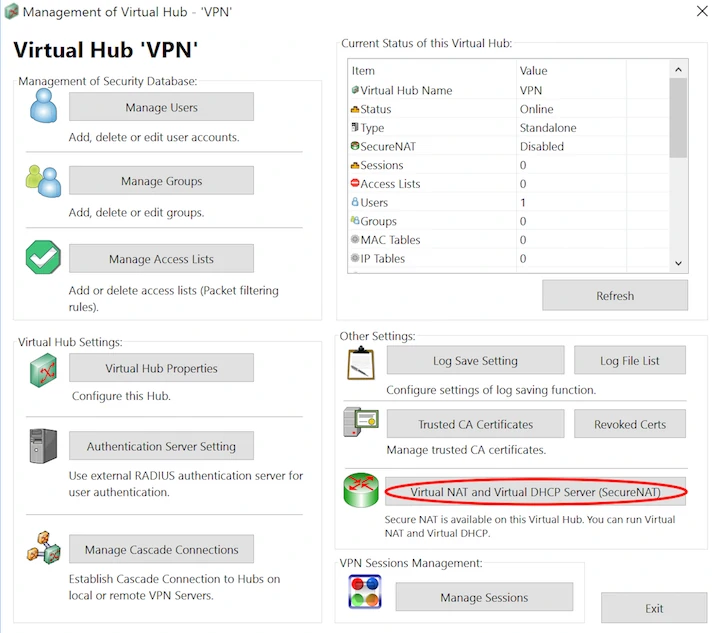
点虚拟NAT和虚拟DHCP服务器,弹出窗口:
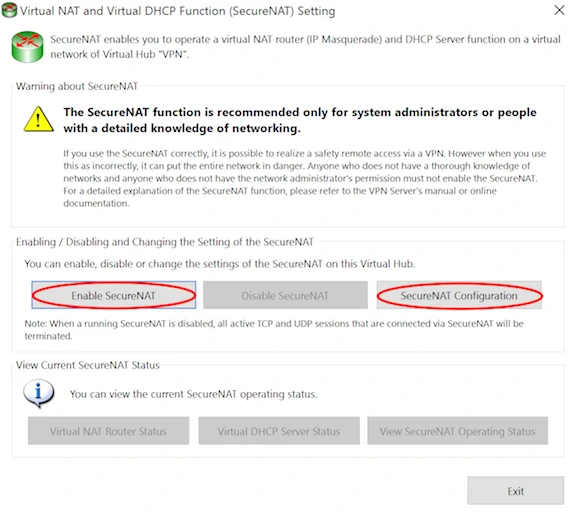
在里面启用SecureNAT并点SecureNAT配置:
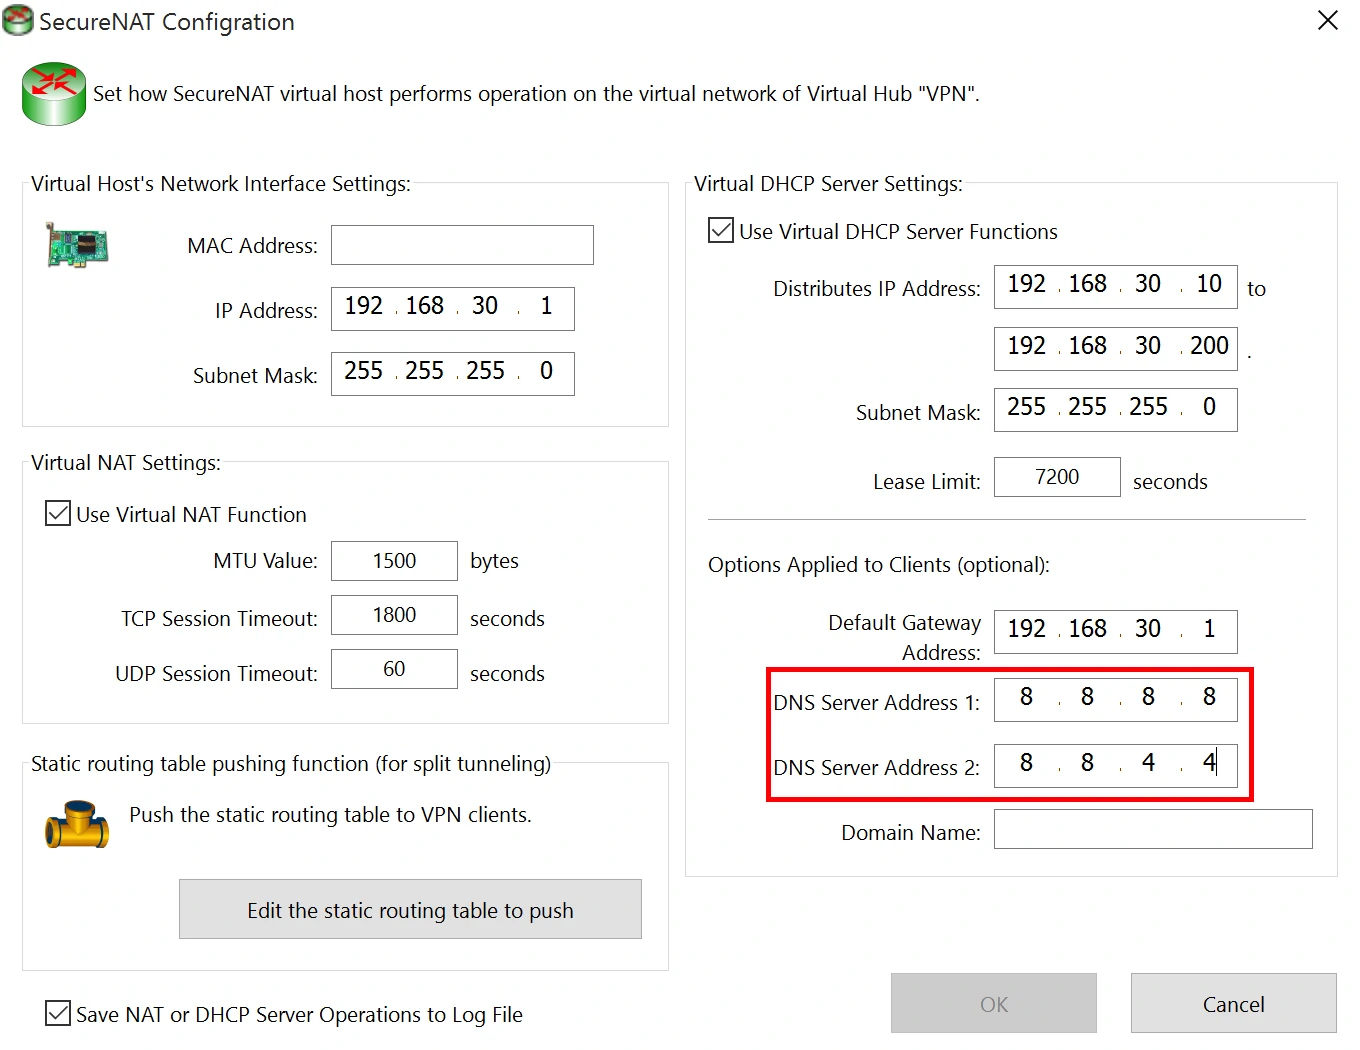
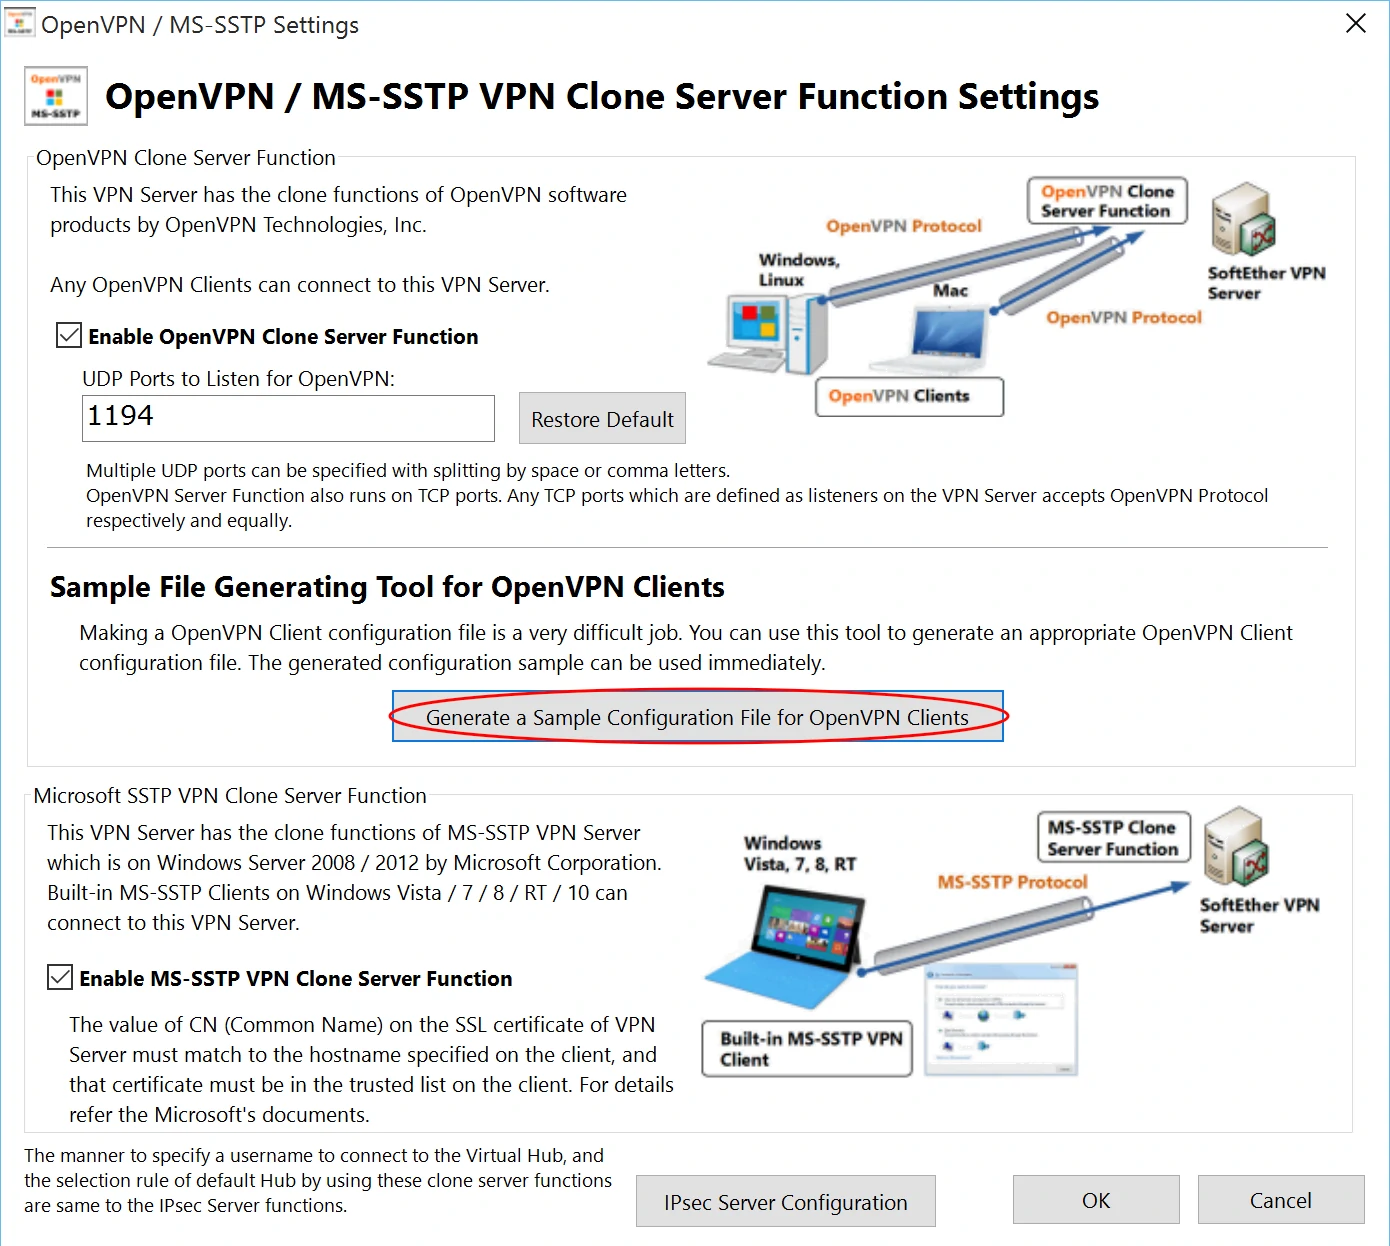
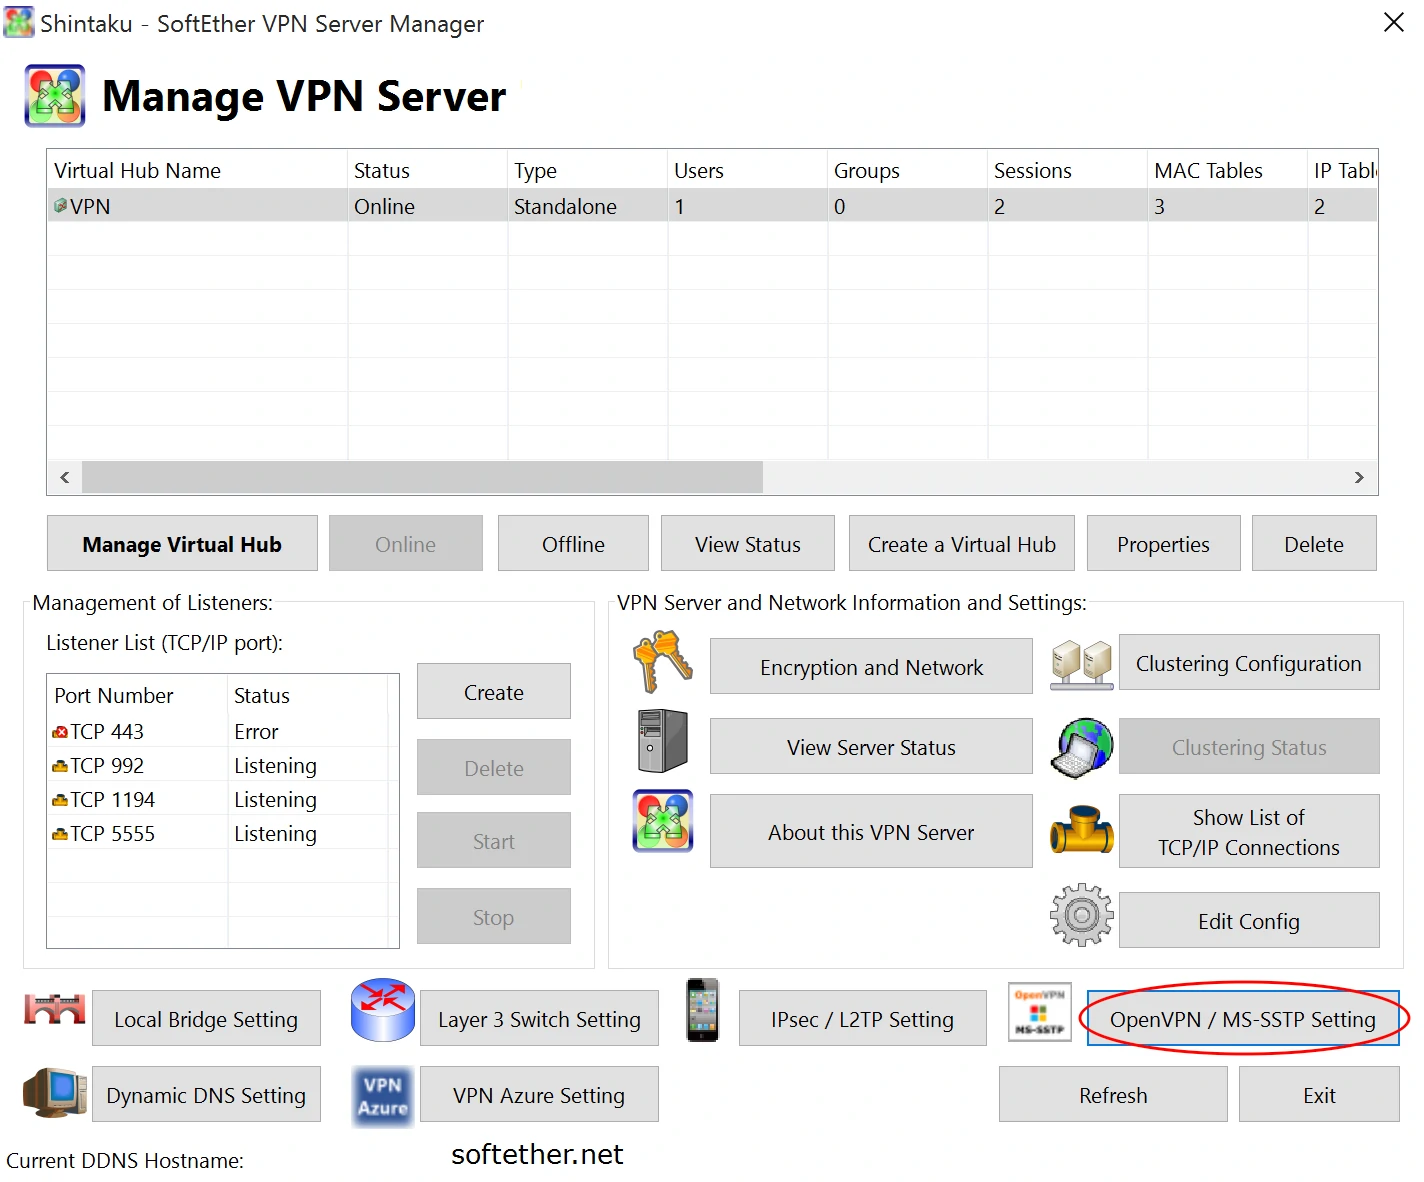
注意DNS要改为8.8.8.8和8.8.4.4。这里就算配置完毕。然后顺便生成一下OpenVPN的配置文件,点OpenVPN / MS-SSTP Setting:
然后点击新窗口中部的按钮生成配置文件:
打开导出的压缩包会看到里面有两个.ovpn文件,一般我们要用到*_openvpn_remote_access_l3.ovpn这个文件,因为我们是通过IPv4地址管理的VPN,所以这个配置文件里的remote一项会是IPv4地址,如果需要使用IPv6的VPN就将其替换为相应的IPv6地址即可。