在Namecheap购买域名的同时可以1.99美元/年的价格购买Comodo PositiveSSL证书,虽然SSL认证和https加密传输不是每个网站都必须的功能,但是对于需要保护隐私的网站进行https加密数据传输还是必须的。PositiveSSL认证是Comodo的入门级产品,PositiveSSL只对你的域名所有权进行认证,并且价格便宜,是目前能买到的最便宜的一款SSL认证服务。
SSL证书不是必须与Namecheap购买的域名关联,你也可以将此ssl证书用在其他地方购买的域名中其他主机上使用,即SSL证书与在哪儿注册域名无关,需要与主机空间关联。
PositiveSSL已经被几乎所有流行的浏览器支持,只要你的PositiveSSL认证正常,用浏览器打开你提供的https网页就像普通的http网页一样,浏览器不会弹出安全警告。
具体步骤:
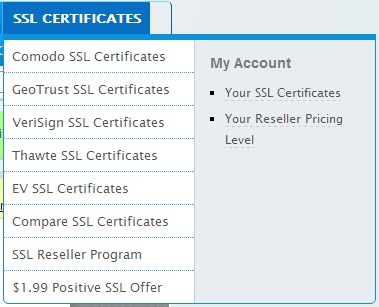
进入Namecheap网站,点击SSL CERTIFICATES菜单中的My Account下方的Your SSL Certificates,如图所示:
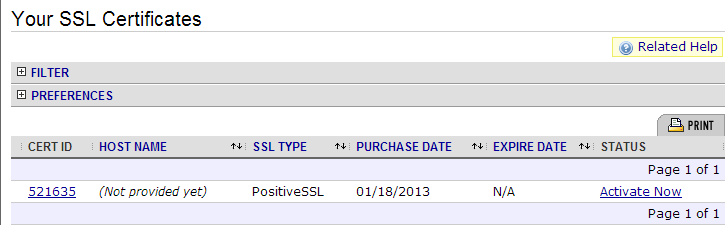
选择你未曾使用过的SSL认证服务,点击右边的Active链接,既可以开始申请激活你的SSL认证。
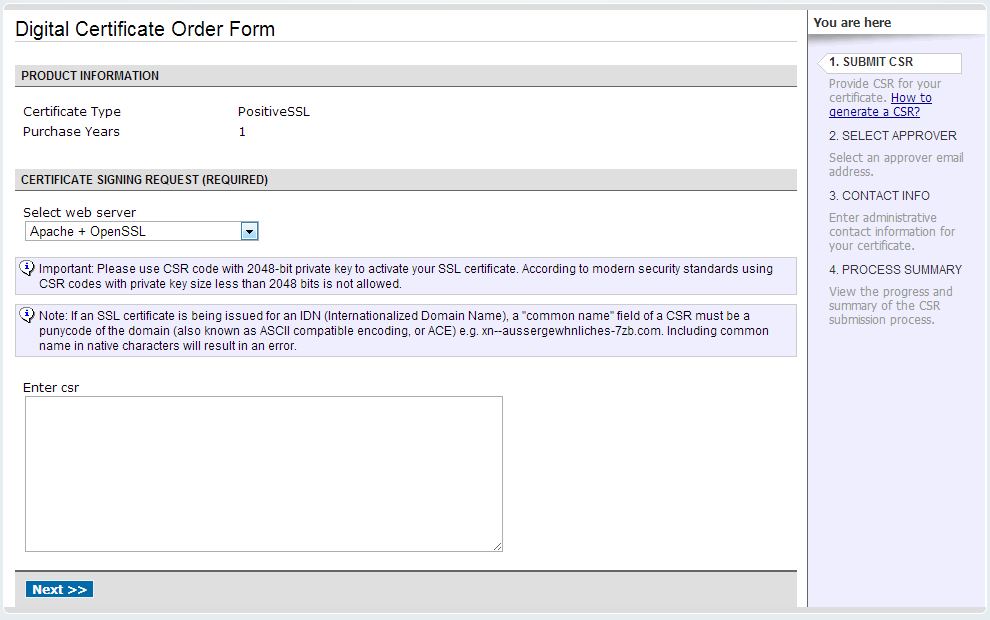
接下来我们要发送一个认证签名请求文件给Namecheap来完成激活过程,通常情况下,选择Apache+OpenSSL类型的签名即可,如果你的网络服务器不是Apache或其兼容服务器,可以在列表里面选择适合你的认证类型。
我们可以从Comodo官方CSR Generation教程中选择CSR Generation: Using OpenSSL (Apache & mod_ssl, NGINX)来学习Comodo PositiveSSL的CSR生成方法。
用SSH客户端连接你的主机,用Linux带的openSSL来生成自己的CSR文件。在命令行中输入:
openssl req -nodes -newkey rsa:2048 -keyout myserver.key -out server.csr
接下来会询问你有关域名,公司,国籍等信息,按照你的情况回答即可,其中有个需要特别注意到地方是Common Name的提问,回答时一定要注意,必须填写你的域名( yourdomain.com ),而且不能有大写字母,否则认证申请会失败,你需要重新联系客服再次申请。
You will now be asked to enter details to be entered into your CSR.
What you are about to enter is what is called a Distinguished Name or a DN.
For some fields there will be a default value, If you enter ‘.’, the field will be left blank.
Country Name (2 letter code) [AU]: GB
State or Province Name (full name) [Some-State]: Yorks
Locality Name (eg, city) []: York
Organization Name (eg, company) [Internet Widgits Pty Ltd]: MyCompany Ltd
Organizational Unit Name (eg, section) []: IT
Common Name (eg, YOUR name) []: mysubdomain.mydomain.com
Email Address []:
Please enter the following ‘extra’ attributes to be sent with your certificate requestA challenge password []:
An optional company name []:
Use the name of the web-server as Common Name (CN). If the domain name (Common Name) is mydomain.com append the domain to the hostname (use the fully qualified domain name).The fields email address, optional company name and challenge password can be left blank for a webserver certificate.
生成两个文件,myserver.key是私钥,server.csr是CSR文件。
一定要备份私钥,如果丢失,没有办法恢复。可以通过输入命令使用私有密钥来生成CSR(Certificate Signing Request)。
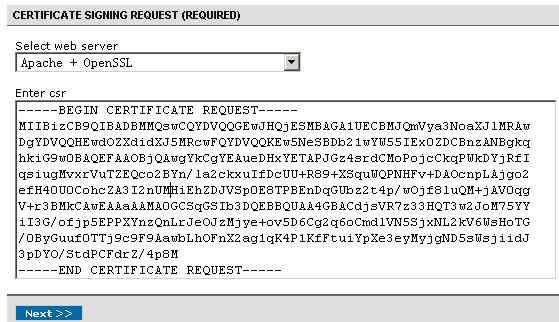
打开CSR文件server.csr,把这个CSR文件的内容复制到刚才申请时页面上的文本输入框里面了,并且点击NEXT,进行下一步。
接下来要求你提供一个能表明你是域名所有者的邮箱来进行验证,一般可以是admin@yourdomain.com,root,webmaster等,你可以从他提供的选项中选择一个,确保你的邮箱有效并且你的邮件服务器可以正常接收邮件。选择一个邮箱后,点击next,你的申请就算提交了,下面需要等授权公司Comodo来验证你是域名所有者身份。
等几个小时之后,Comodo会发送一封邮件给你刚才提供的信箱。
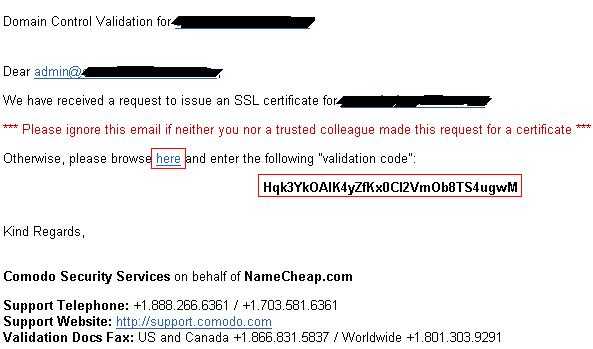
点击邮箱里面的 here 链接,并且输入下面的验证码,提交给Comodo即可。接着继续等,comodo会在数个小时之内将生成的ssl证书文件发送给你。其中邮件包含一个附件,里面有四个文件,之一就是你的认证文件,另外有个重要的是positivessl根认证证书。你需要在apache或者其他网络服务器正确配置它们来保证你的ssl网络服务工作正常。
http://www.bsmdevelopment.com/Reference/Sections/InstallNotes-Apache.html
If your CA sends you individual certificates for the certificate chain, you’ll have to concatenate them together in order, from their certificate up to the root certificate, to create the bundle file. Here’s an example of how to do it for a Comodo-issued certificate, given that the cert chain is as follows:
website.com.crt
COMODORSADomainValidationSecureServerCA.crt
COMODORSAAddTrustCA.crt
AddTrustExternalCARoot.crt
Use cat to concatenate the certs together into the bundle:
cat COMODORSADomainValidationSecureServerCA.crt
COMODORSAAddTrustCA.crt AddTrustExternalCARoot.crt
>CA-bundle.crt
You can now use this bundle as described above.
Incidentally, if you’d like to verify that your certificate and bundle are correct, you can do so like this:
openssl verify -CAfile CA-bundle.crt website.com.crt
Or, if you are using GnuTLS, you’ll have to concatenate all of the certificates together into a single file. Be sure that your certificate preceeds the certificate chain in the file and give the file a name something like website.com_CA-bundle.crt. If the CA sent you a bundle file (or you created one with your text editor), do it like this:
cat website.com.crt CA-bundle.crt >website.com_CA-bundle.crt
If you were given individual certificates for the certificate chain, as in the Comodo-issued certificate example above, do it like this:
cat website.com.crt COMODORSADomainValidationSecureServerCA.crt
COMODORSAAddTrustCA.crt AddTrustExternalCARoot.crt
>website.com_CA-Bundle.crt
Once you have all the certificates concatenated into a single file, point to it in the Apache config file like this:
GnuTLSCertificateFile /etc/httpd/ssl/website.com_CA-bundle.crt
If you ever need to port your cert to an IIS server, you will need to convert it to pkcs12 format and include the key, along with the cert and CA bundle. This can all be done with a single OpenSSL command:
openssl pkcs12 -export -out website.com.pfx -inkey website.com.key
-in website.com.crt -certfile website.com_CA-bundle.crt
Since the resultant “.pfx” file contains your private key, along with your certificate, be sure to password protect the exported file with a strong password, especially if you are planning to send it anywhere via an insecure channel (e.g. email). If this file should fall into the wrong hands, it would allow the bad guys to masquerade as you with impunity. And, as far as we know, there’s no such thing as certificate revocation that actually works so they’ll be doing it for the life of the cert. There will be nothing you can do about it, short of getting a new domain name and convincing all of your users to switch.
If at any time, you need to list the contents of a pkcs12 format cert, you can do so like this:
openssl pkcs12 -in website.com.pfx -nodes